Initial Idea
To Teach With Senses Other Than Sight
Communicating what something looks like on the spot can be difficult for parents. The Touch & Learn toy would take that pressure off them and allow their children to understand the world around themselves better.
How It Functions
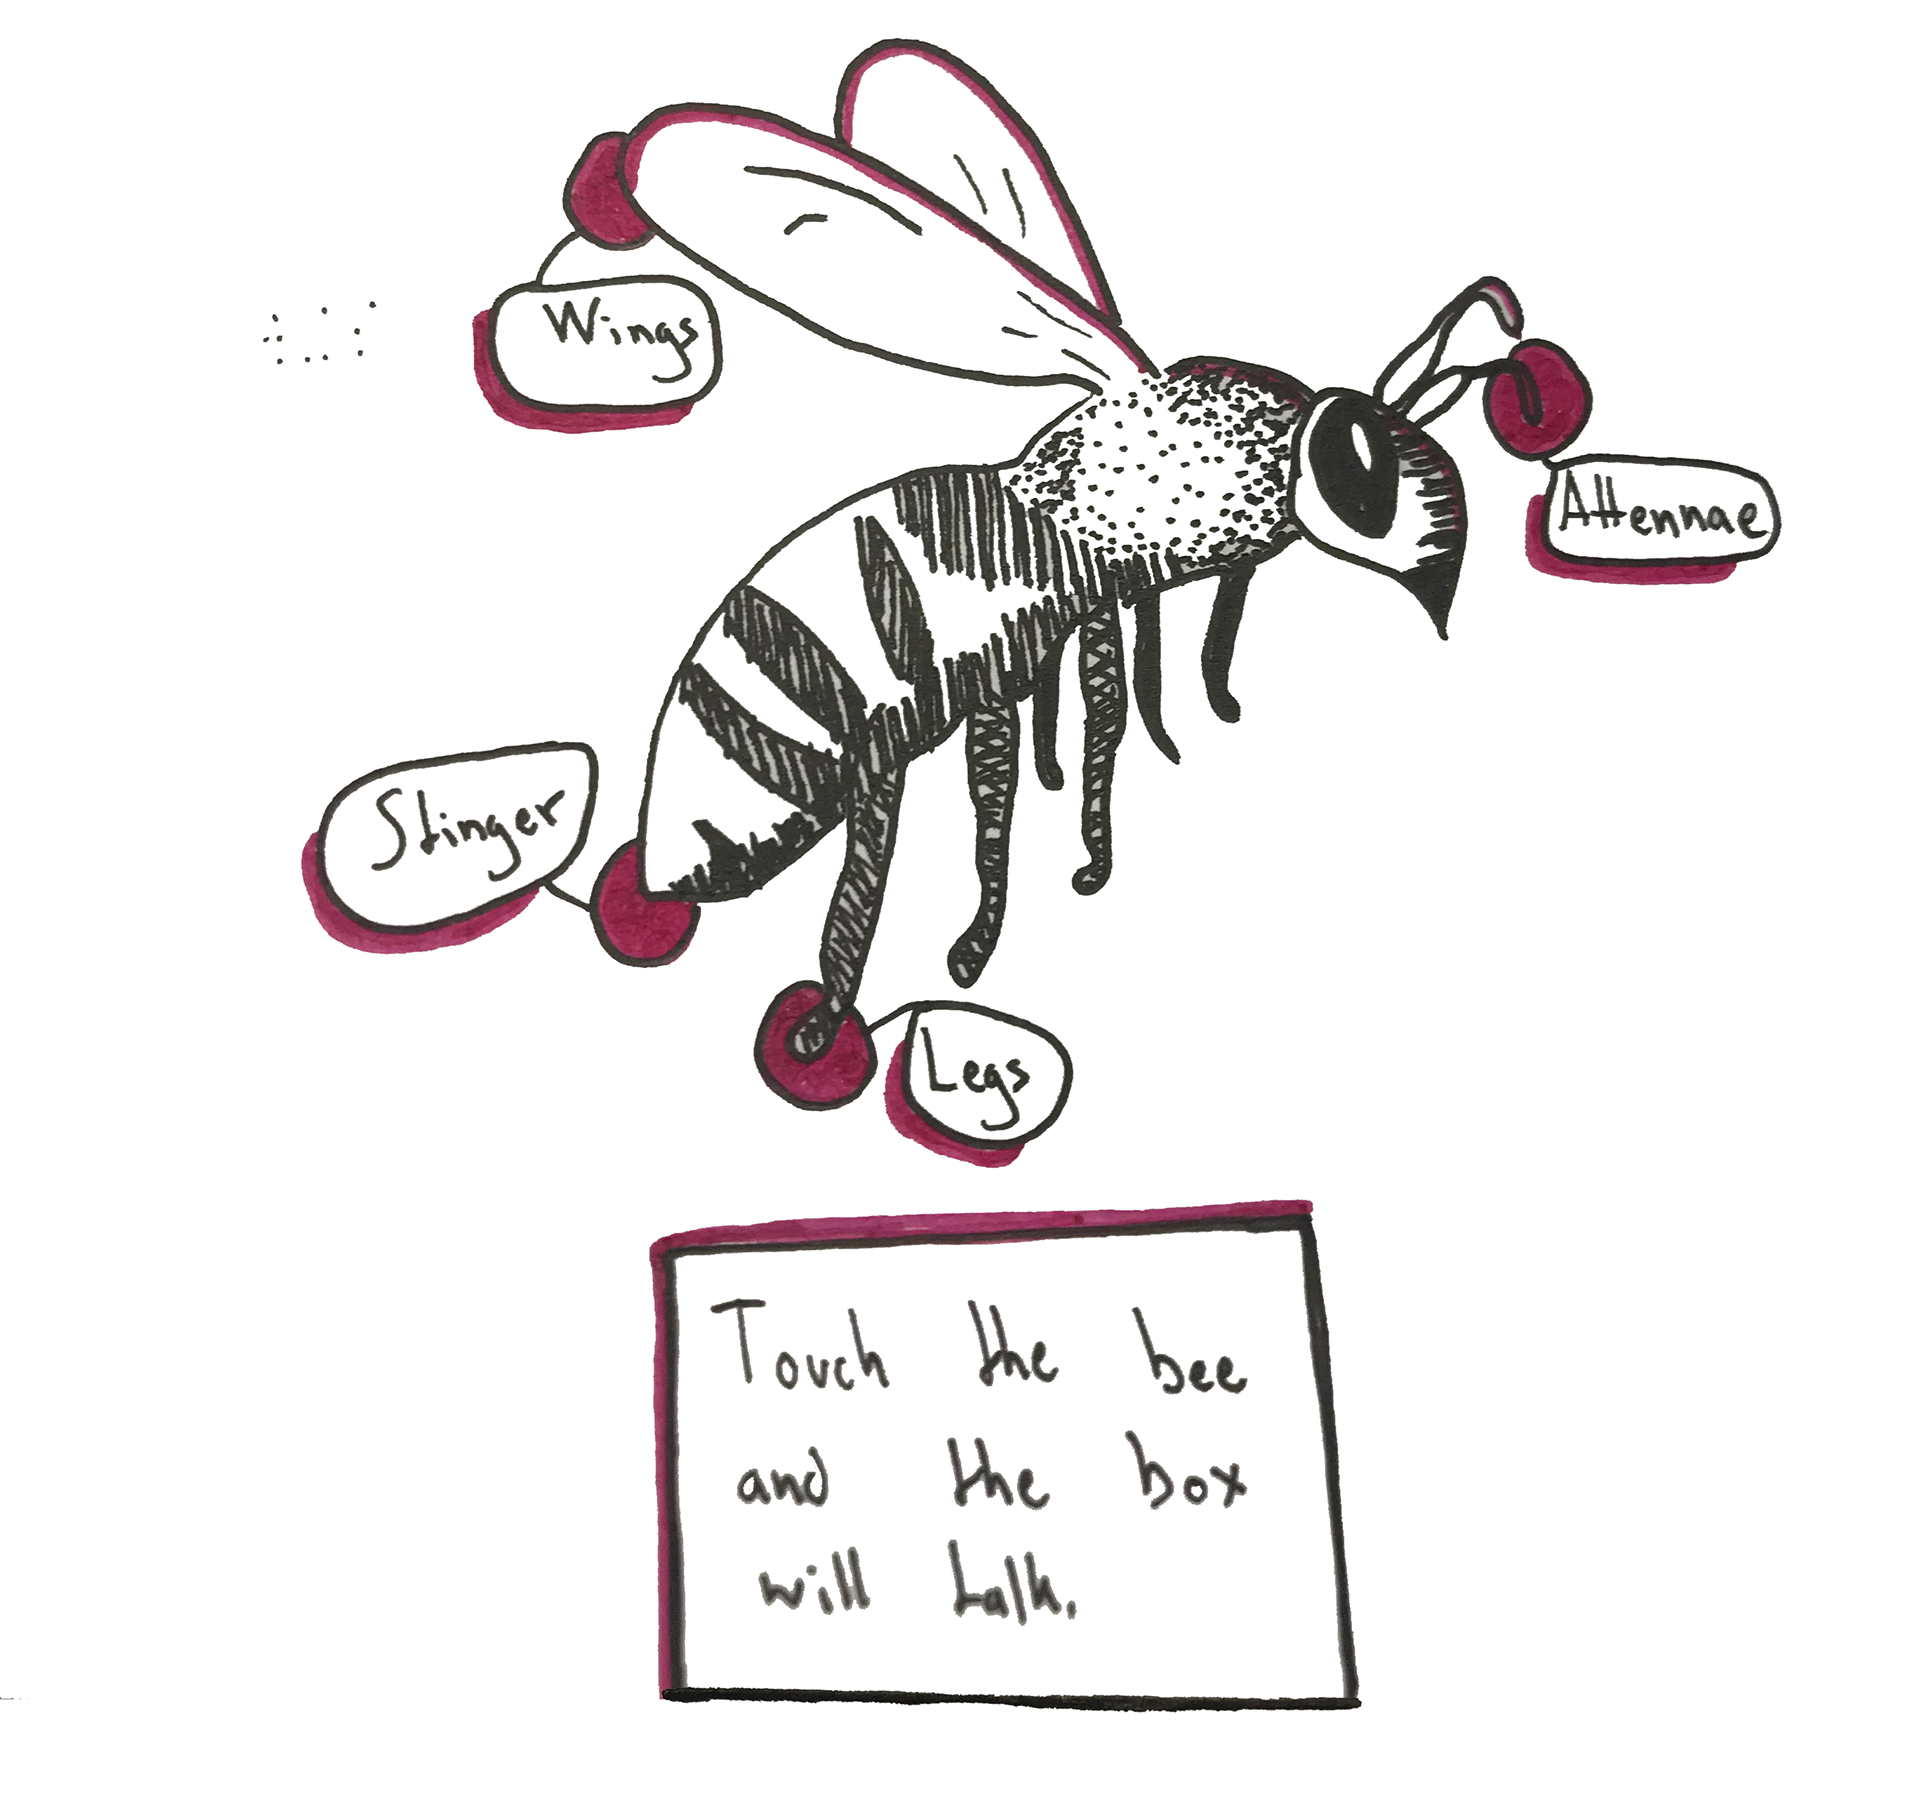
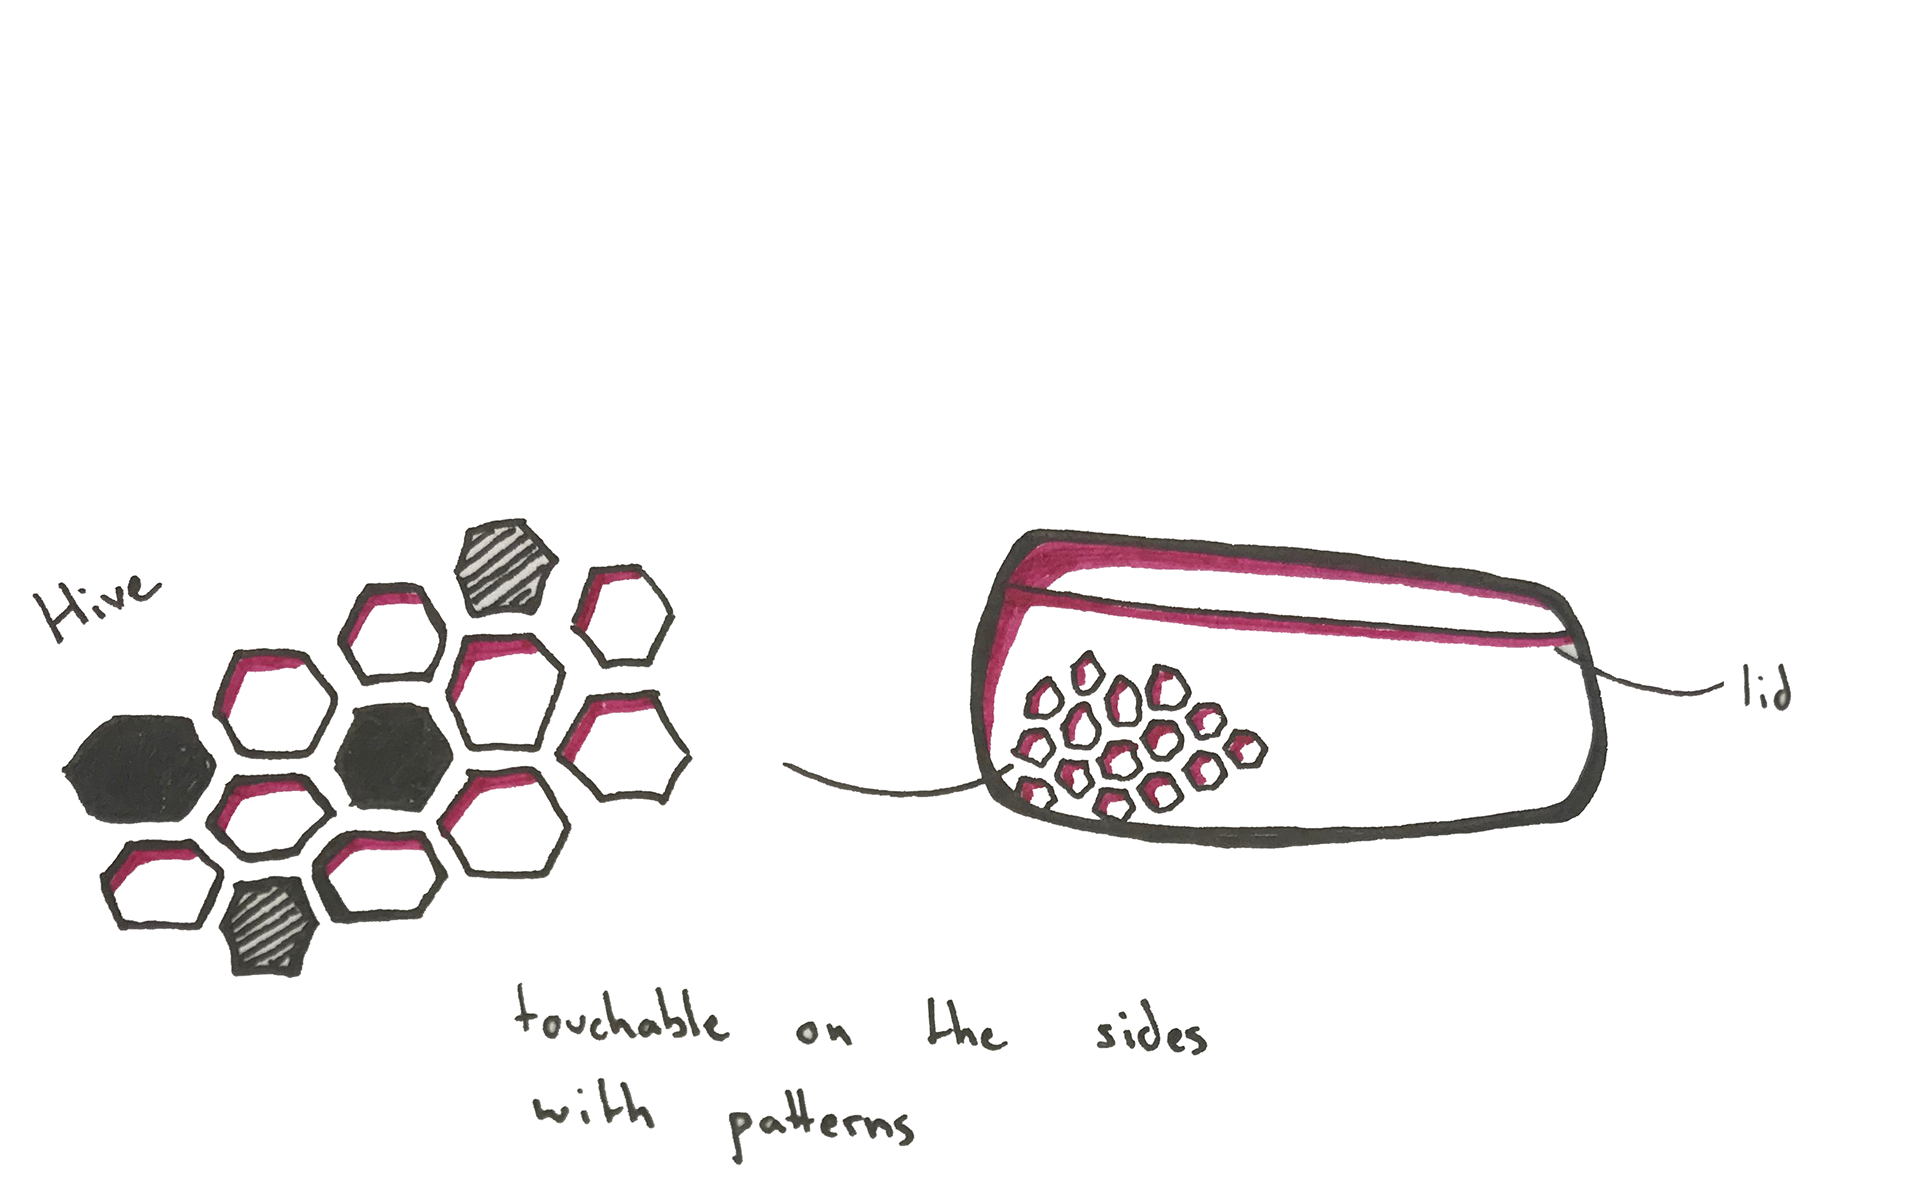
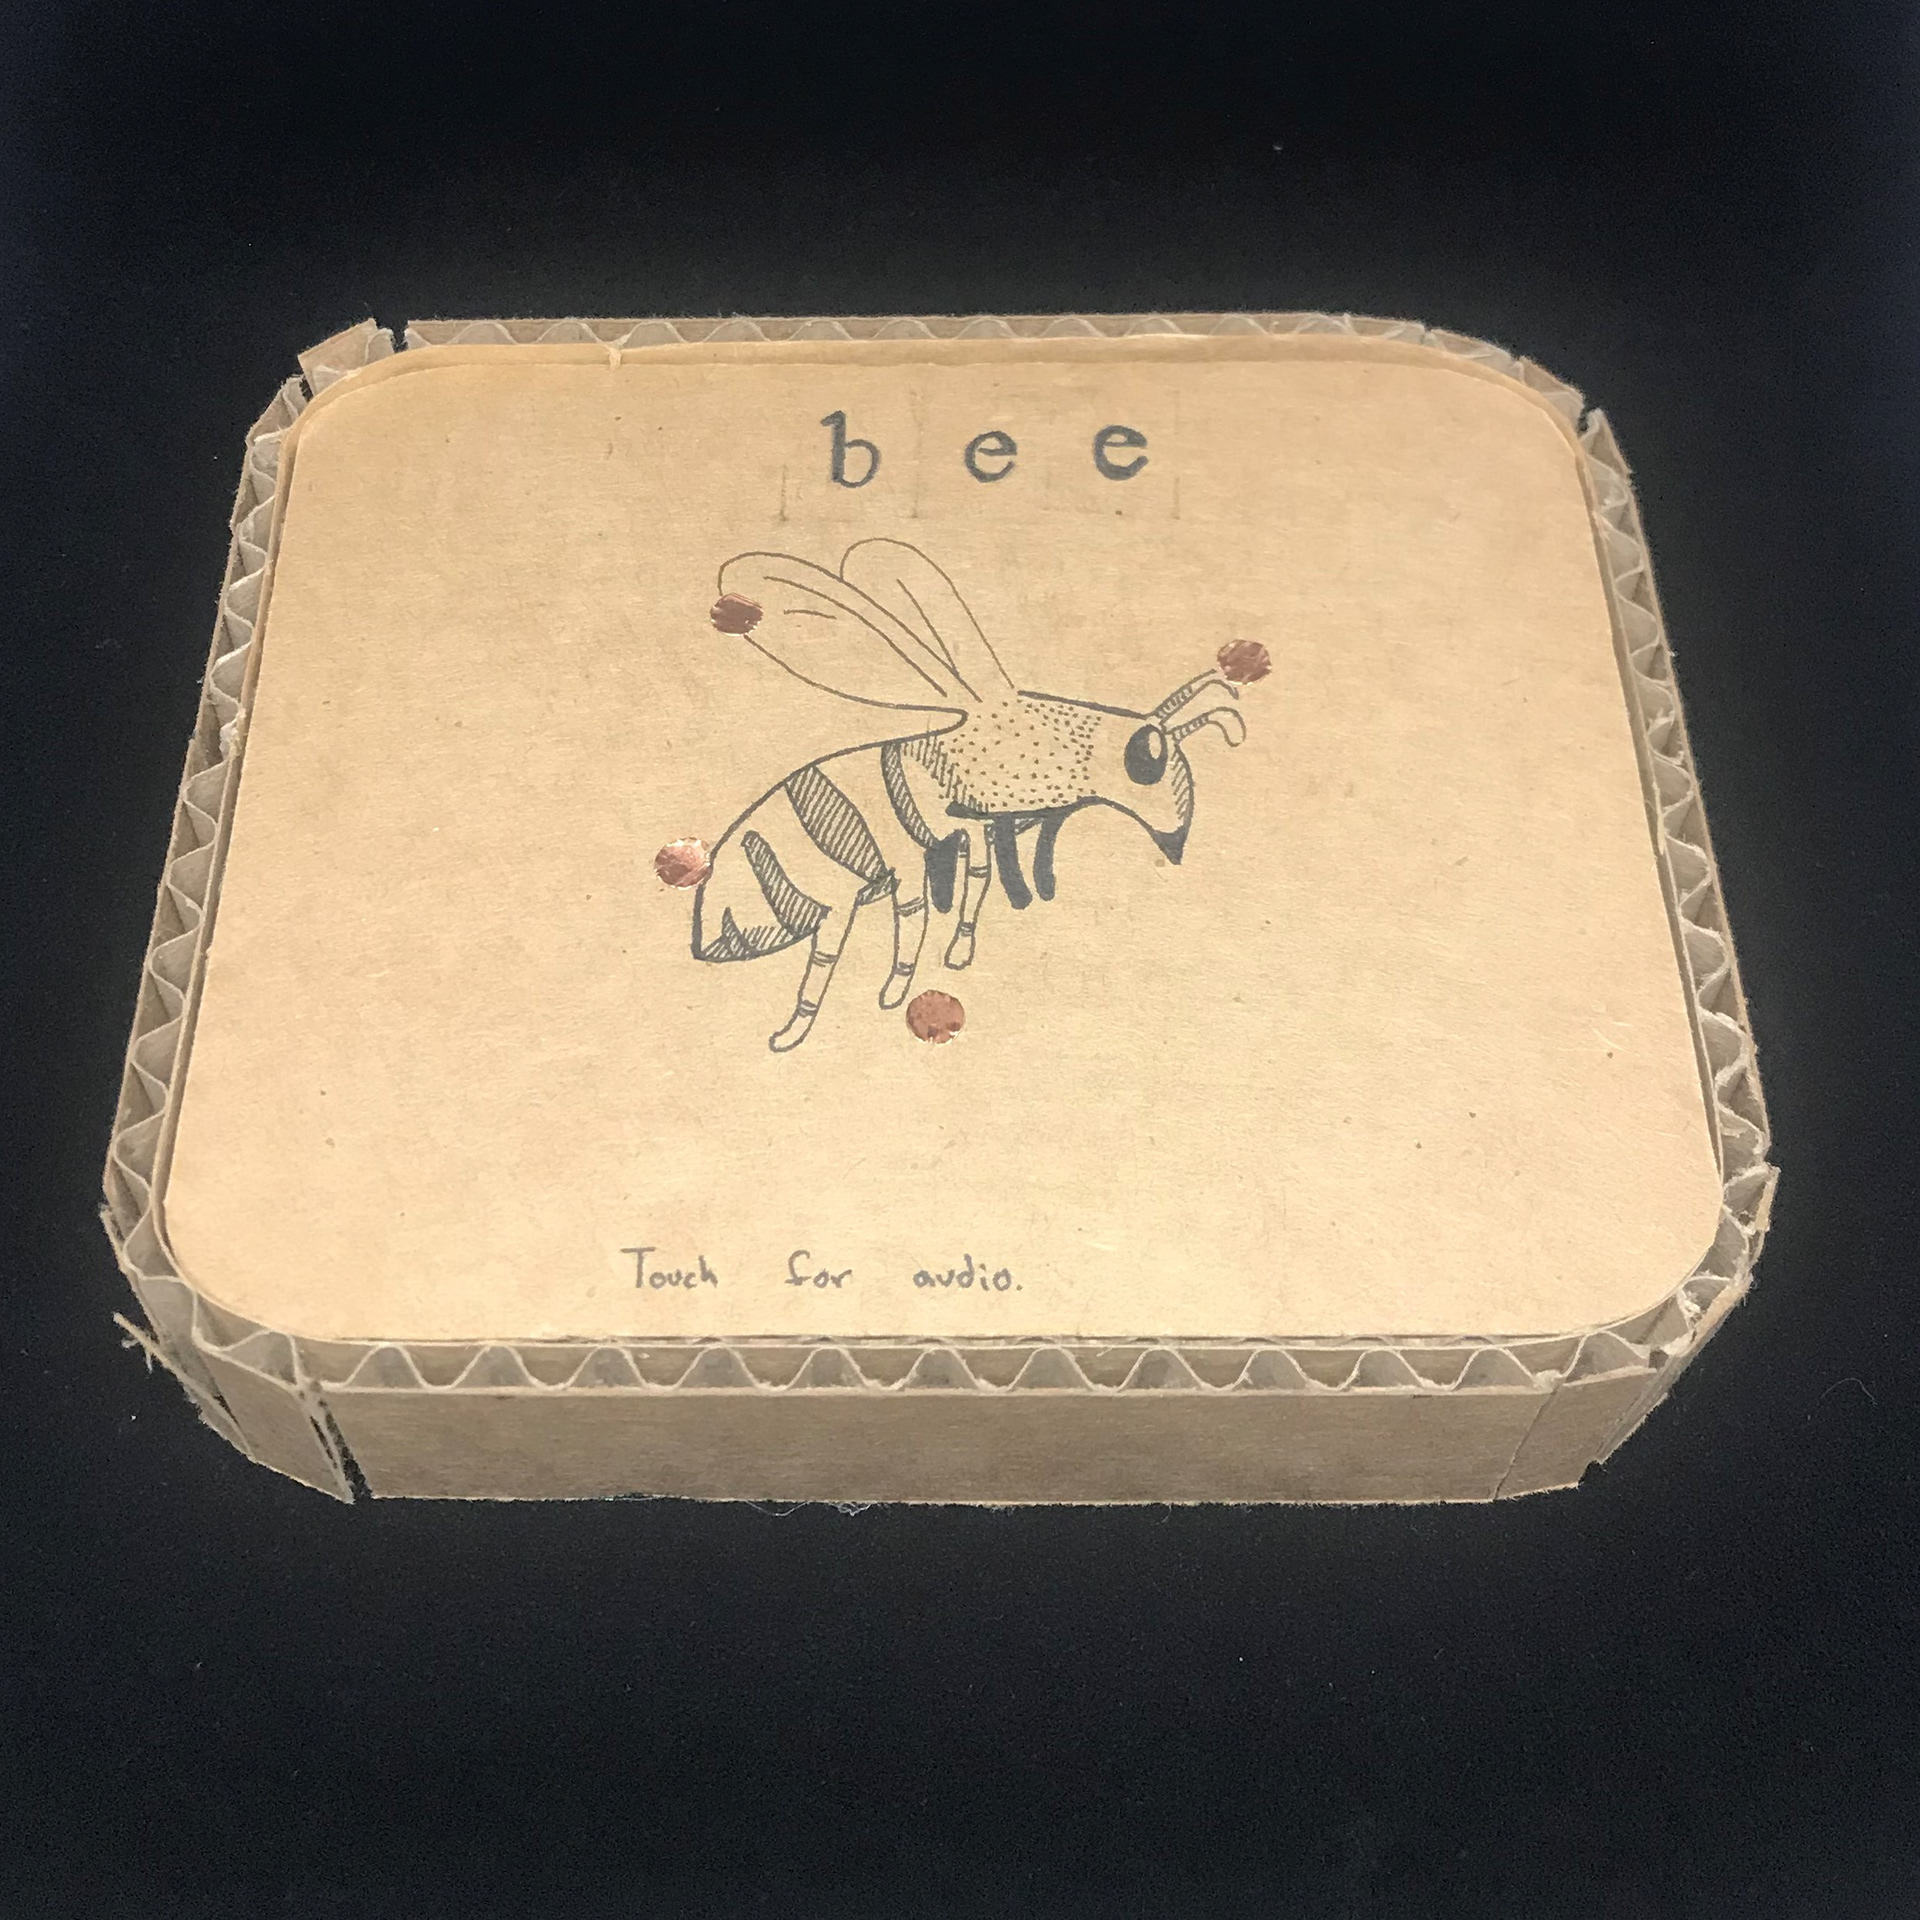
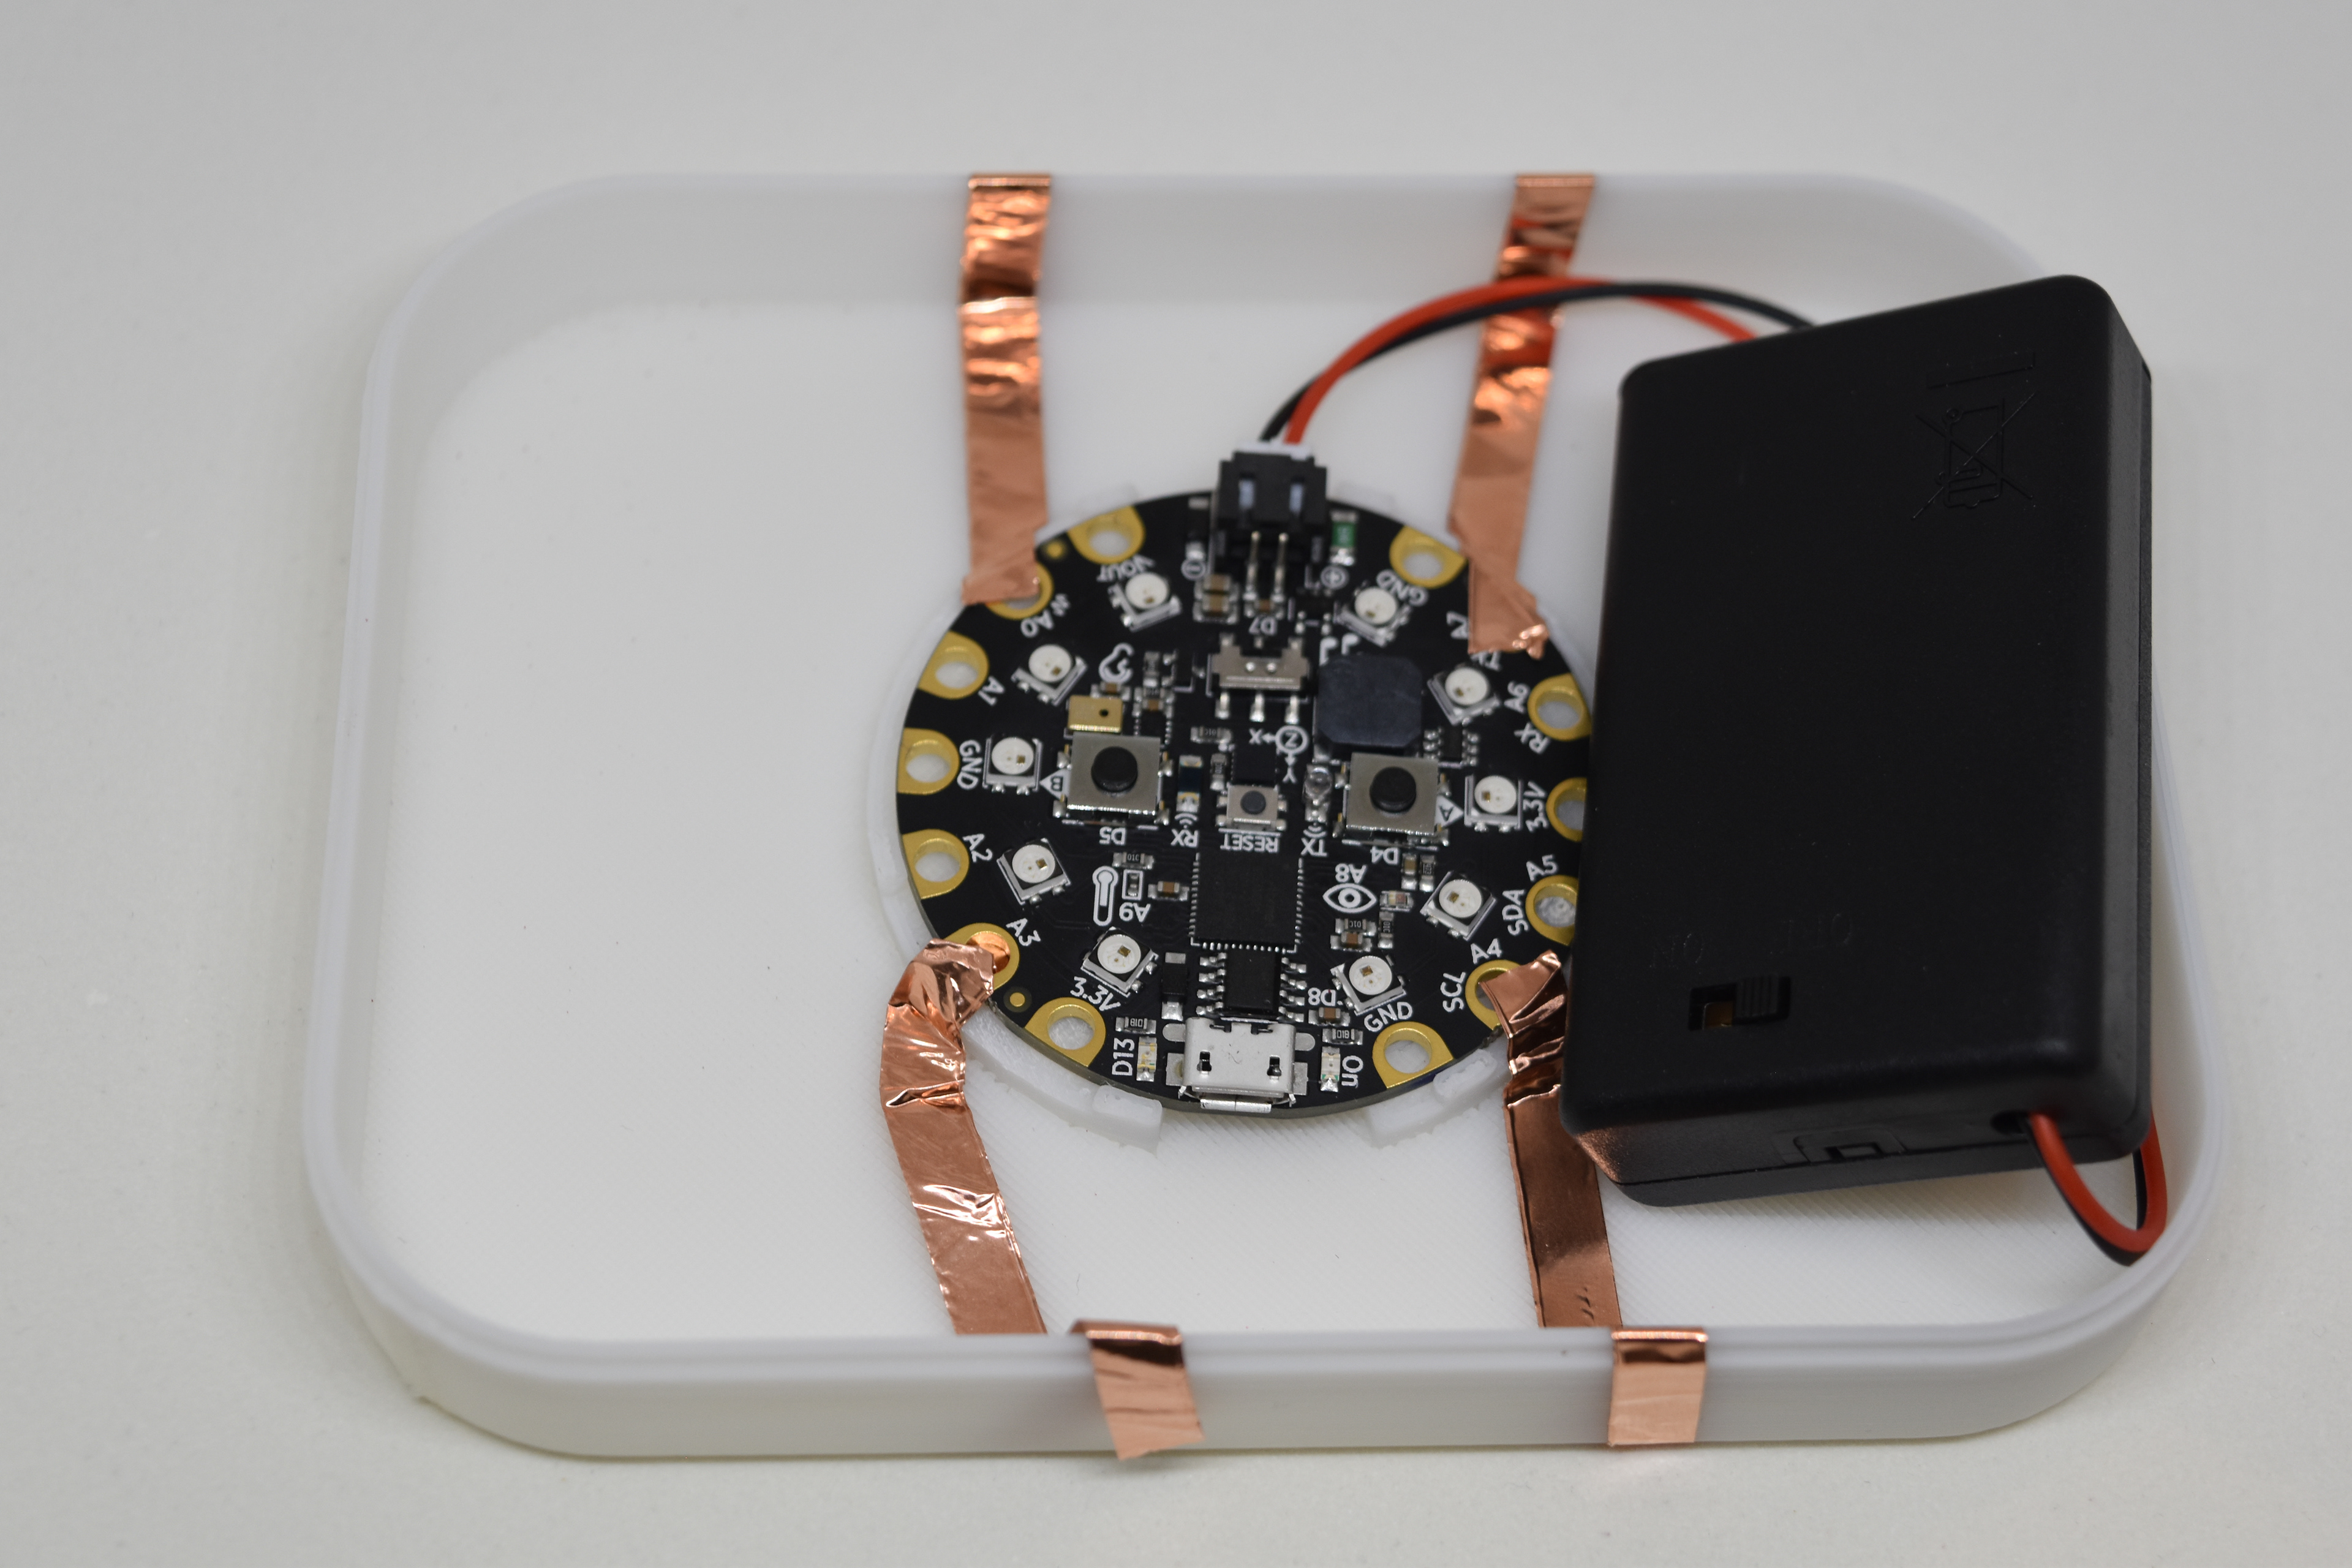
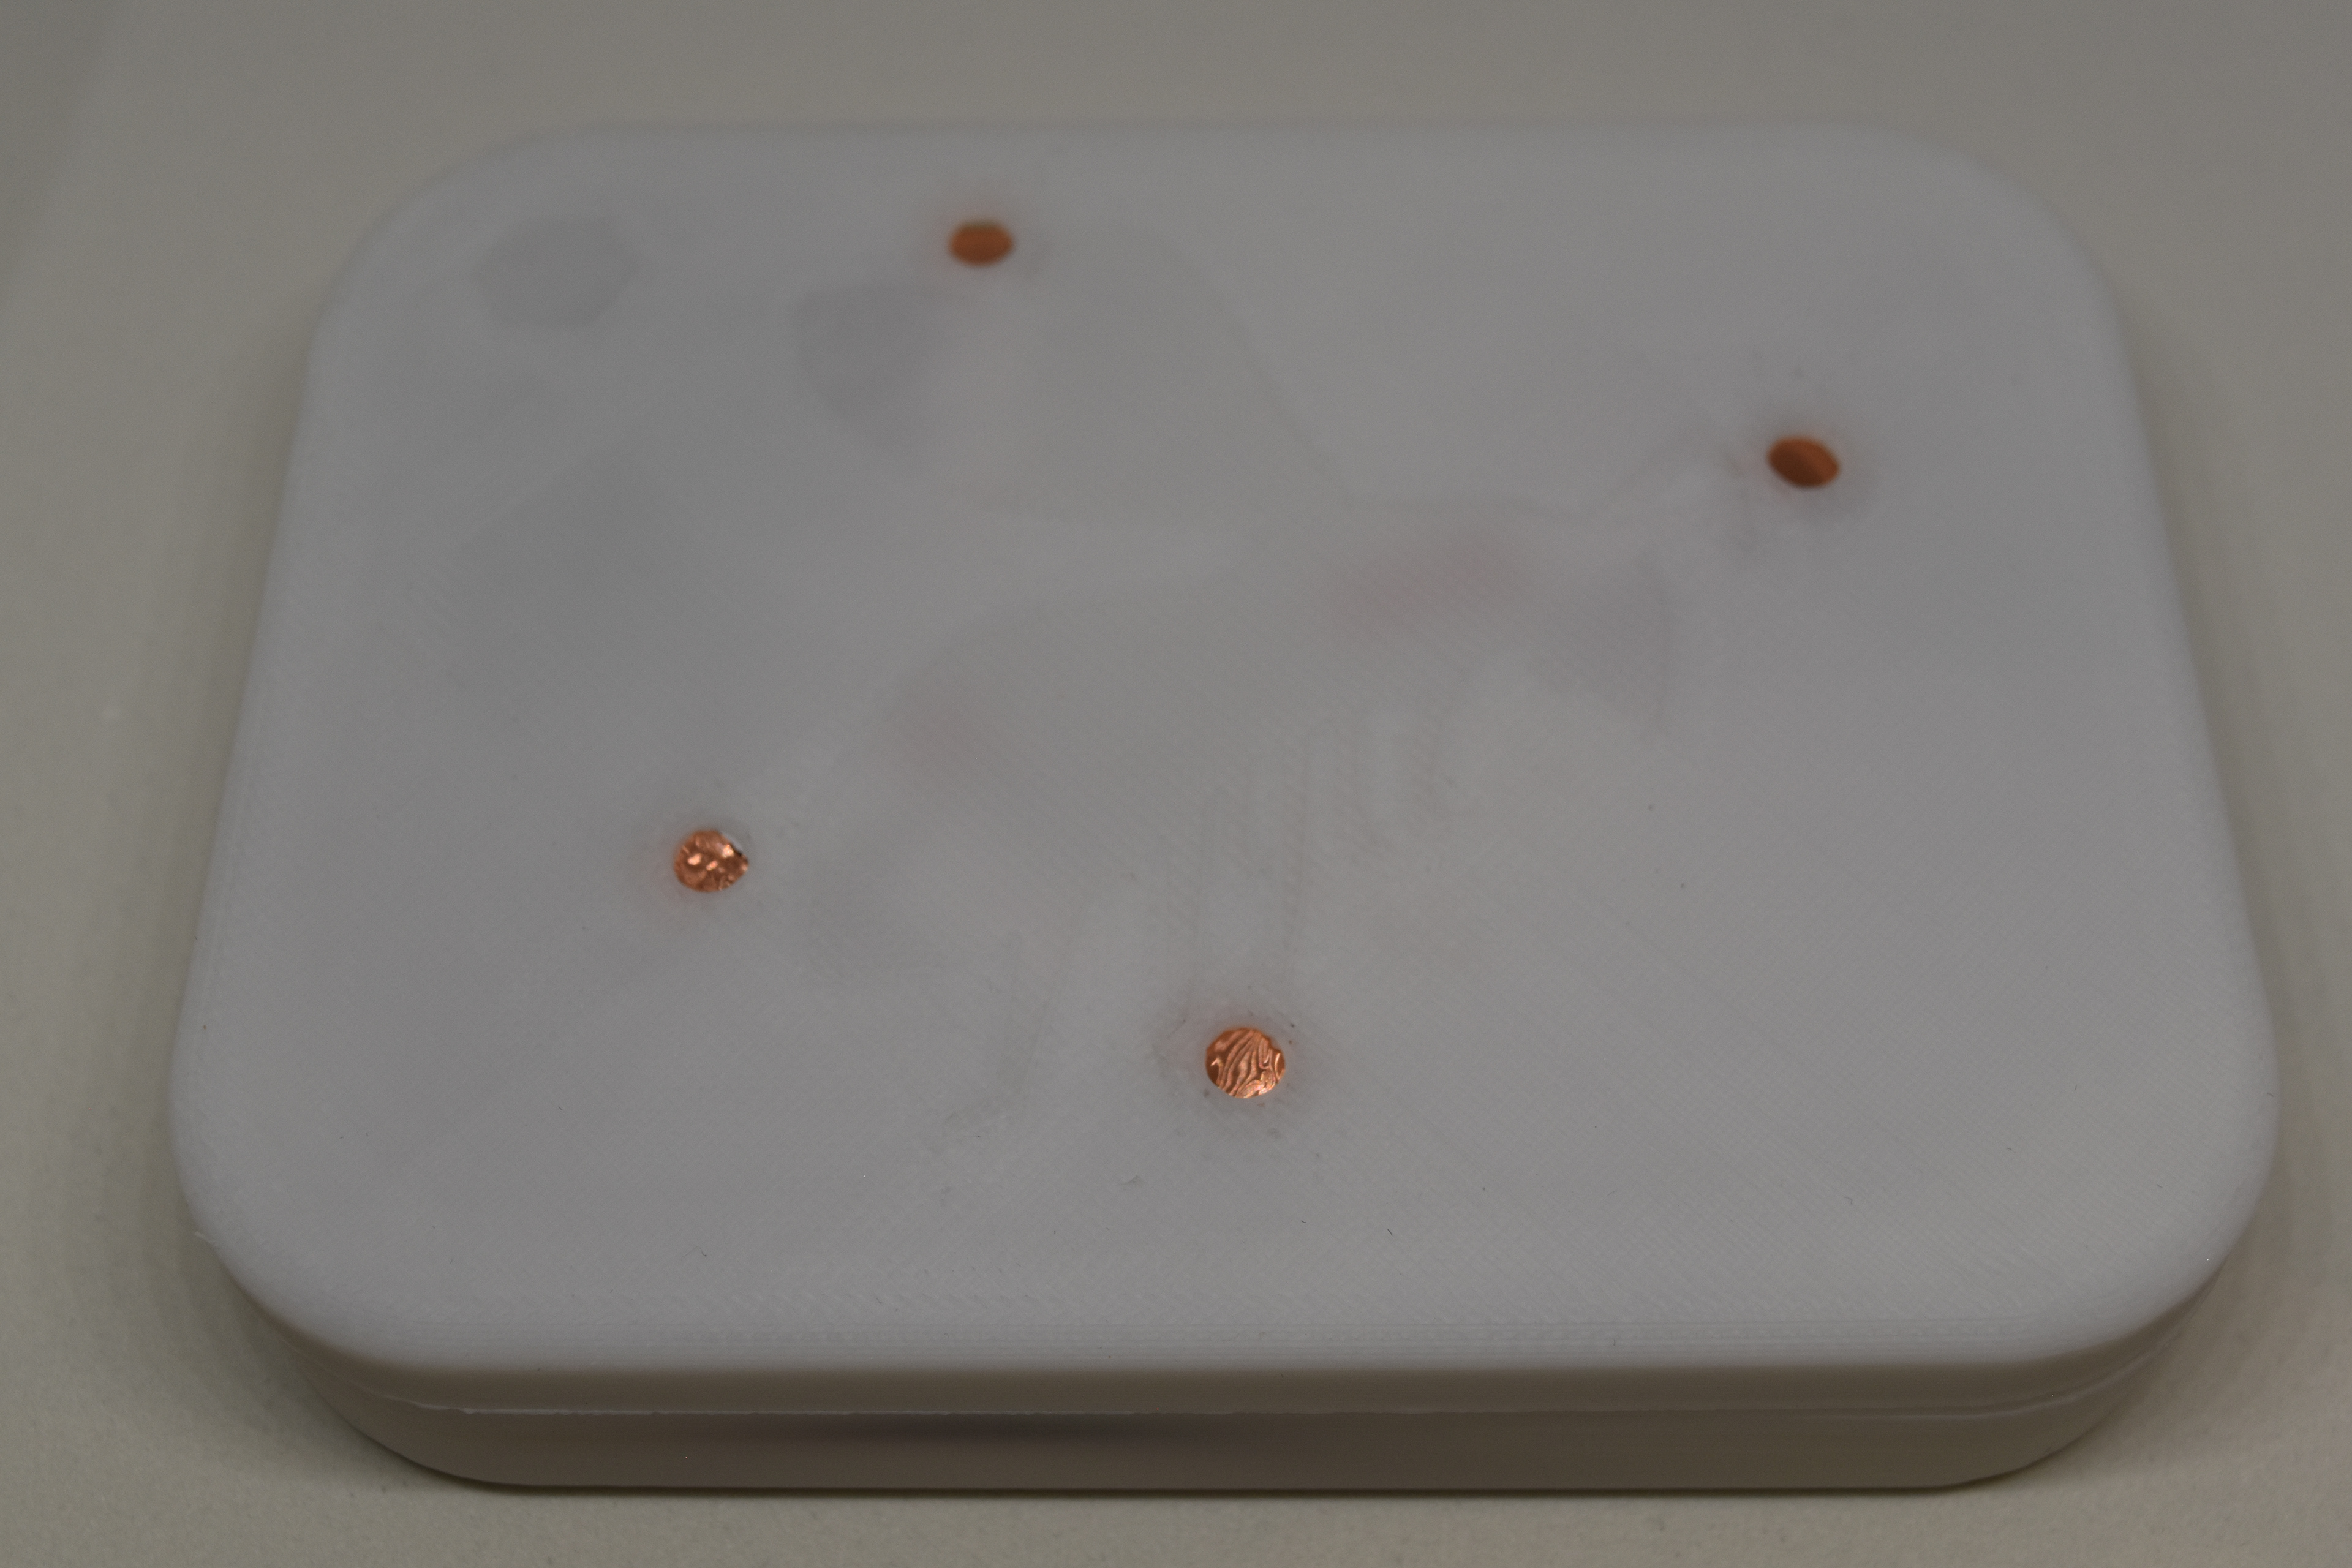
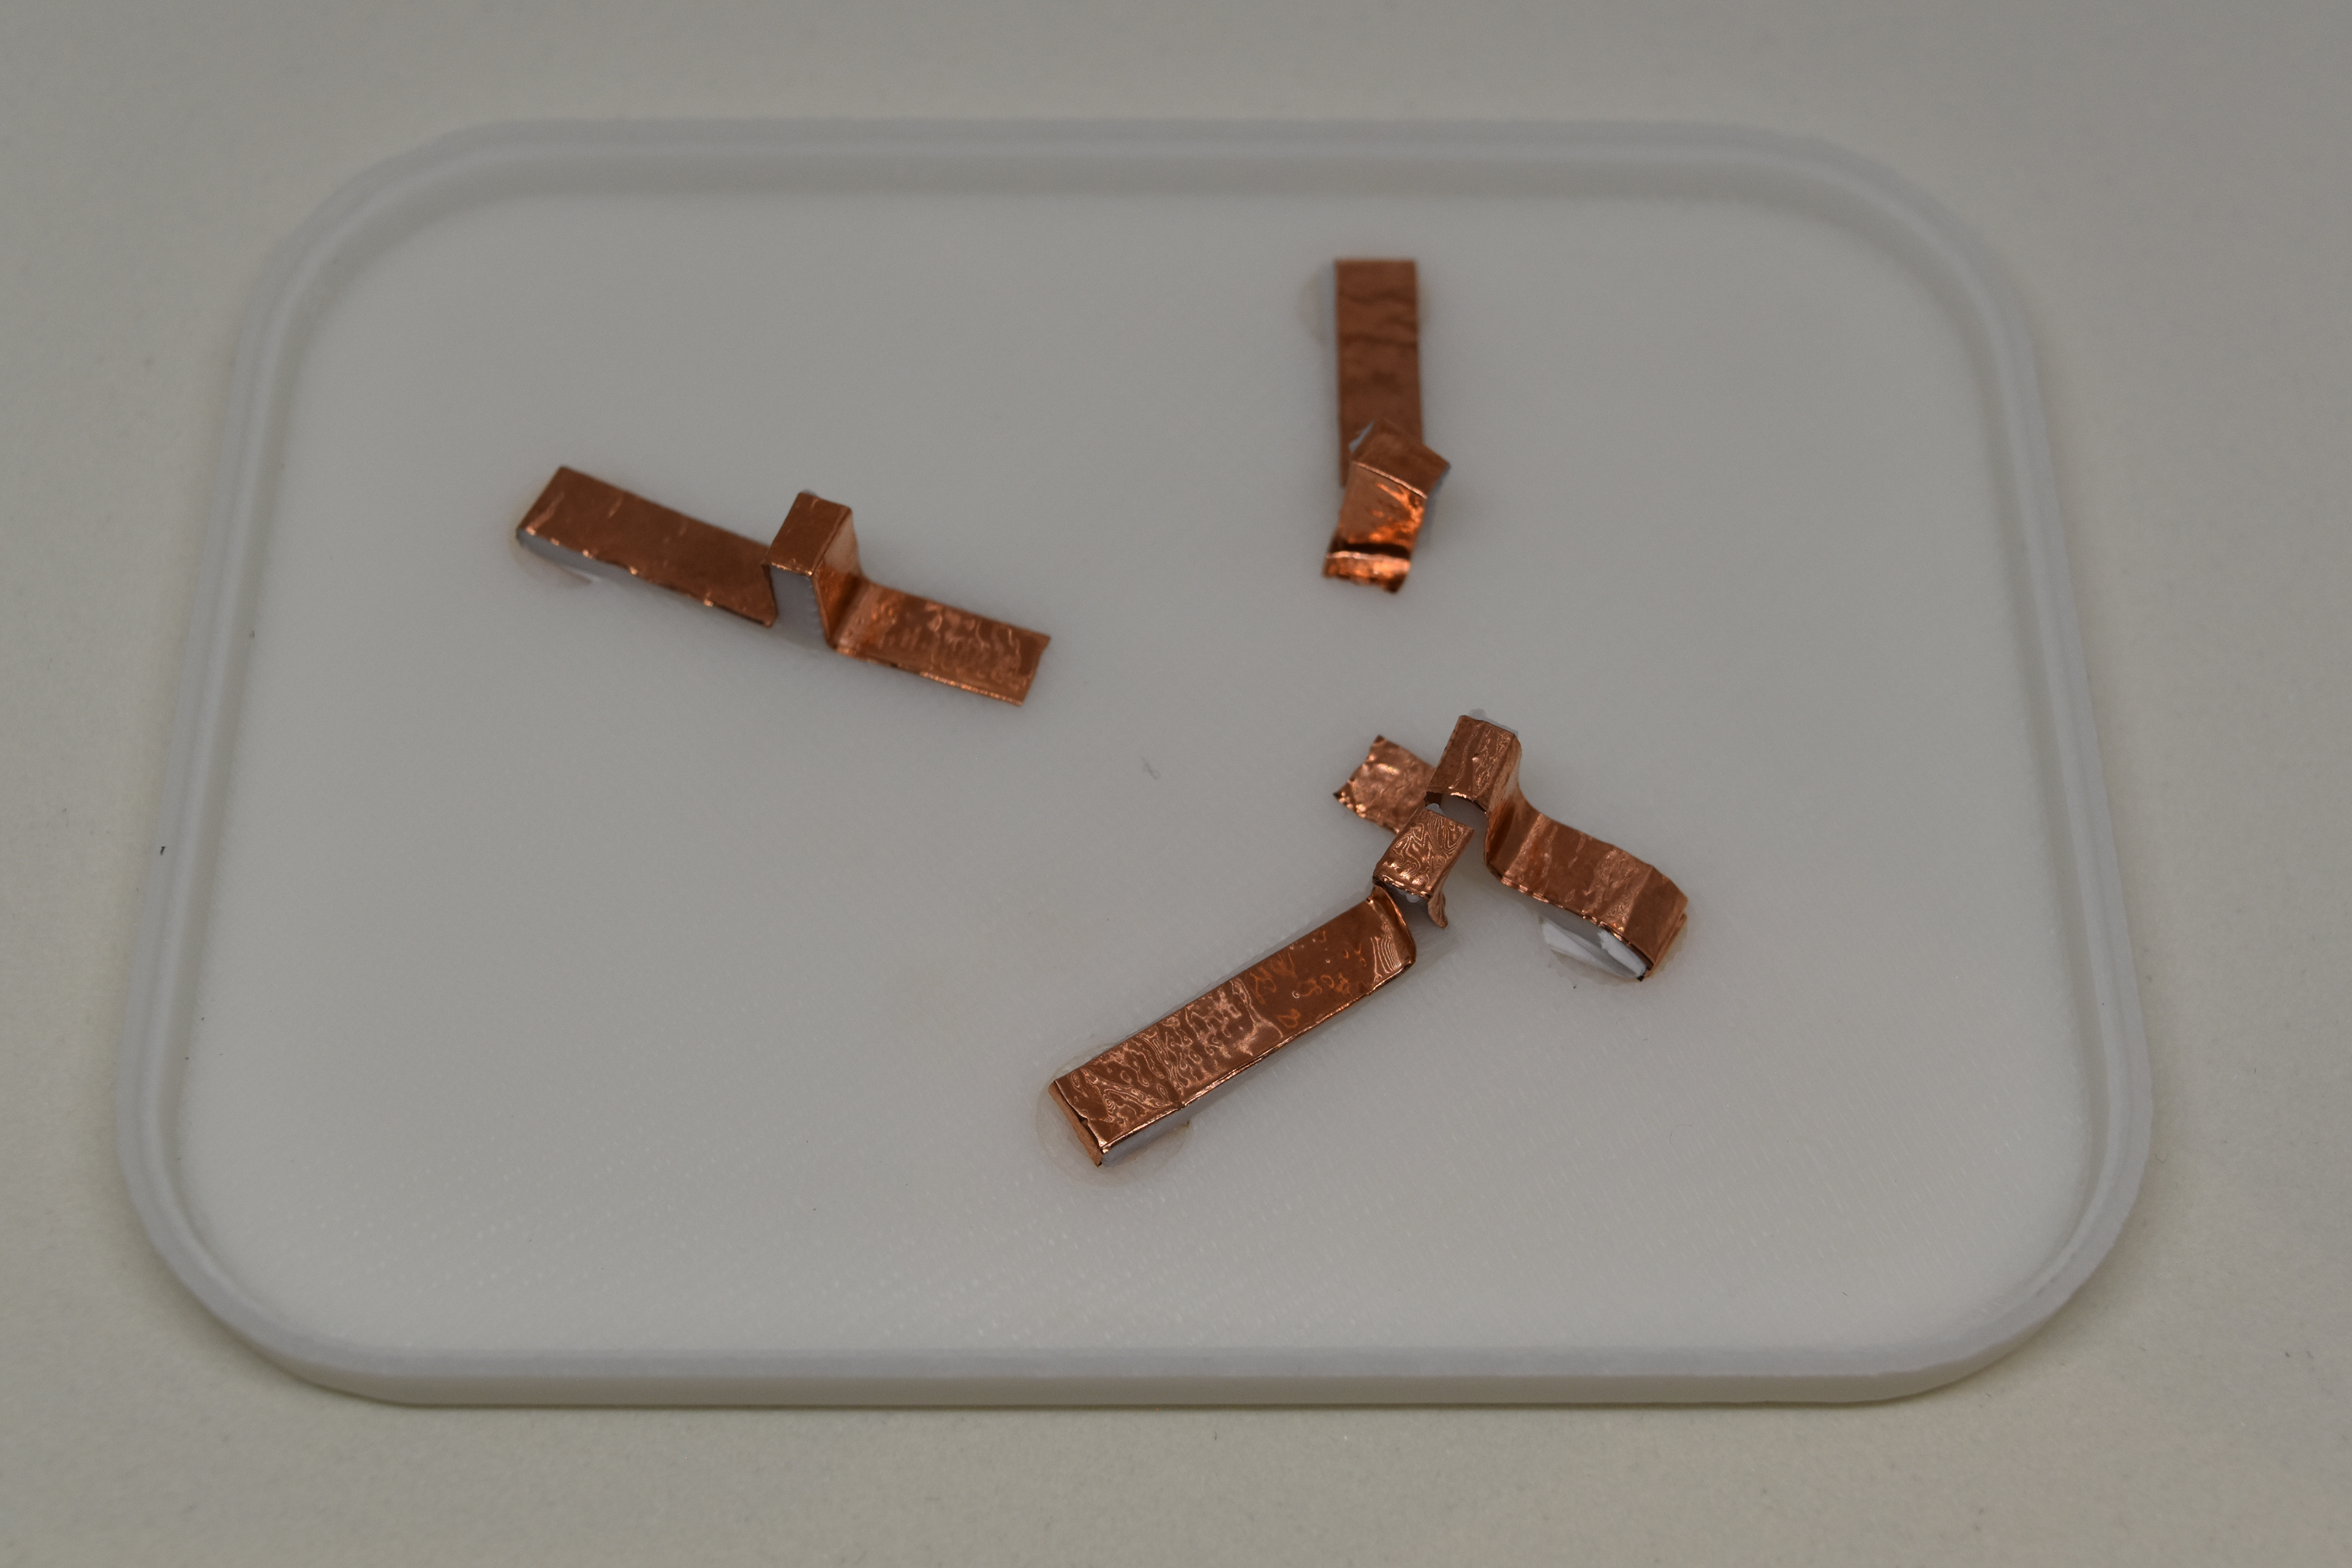
Certain areas on the box would have copper tape connected to a Circuit Playground on the inside. When a child touches the copper tape, then the Playground would play the sound file associated with that piece of copper tape. The box itself has different shapes embedded in it so the child can use her fingers to see.

Testing Form
I tried different sizes using cardboard. I wanted the box to be small, because it would be for children’s hands.
I decided to make the toy in the shape of a box so that the lid could be swapped for a lid with a different animal.
Modeling in Solidworks
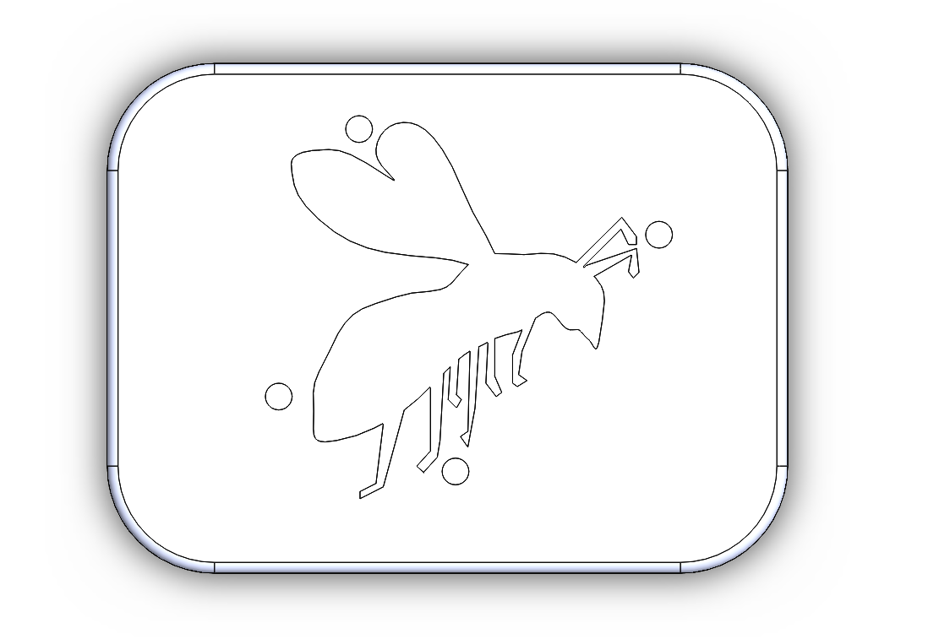
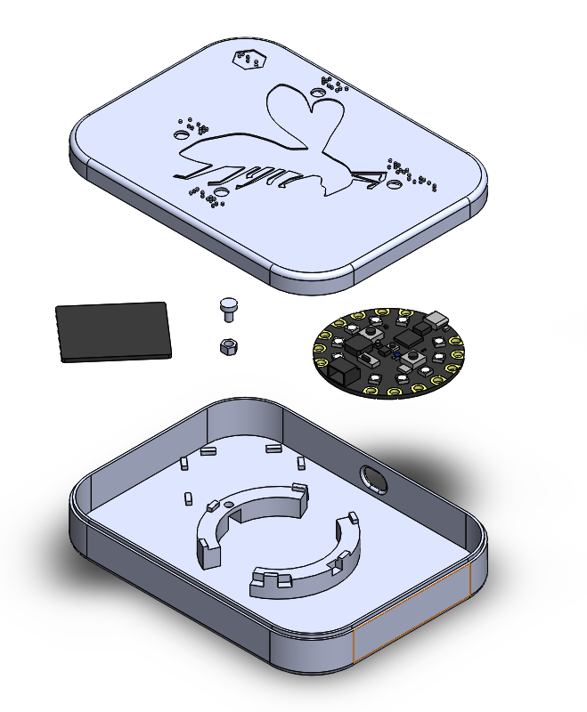
My initial drawings of the bee were more detailed than the bee I was able to model in Solidworks.
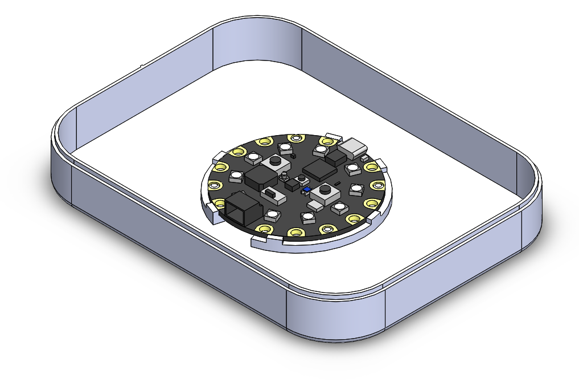
Other than the bee, the design was straightforward. The box had minimal material with filleted edges.
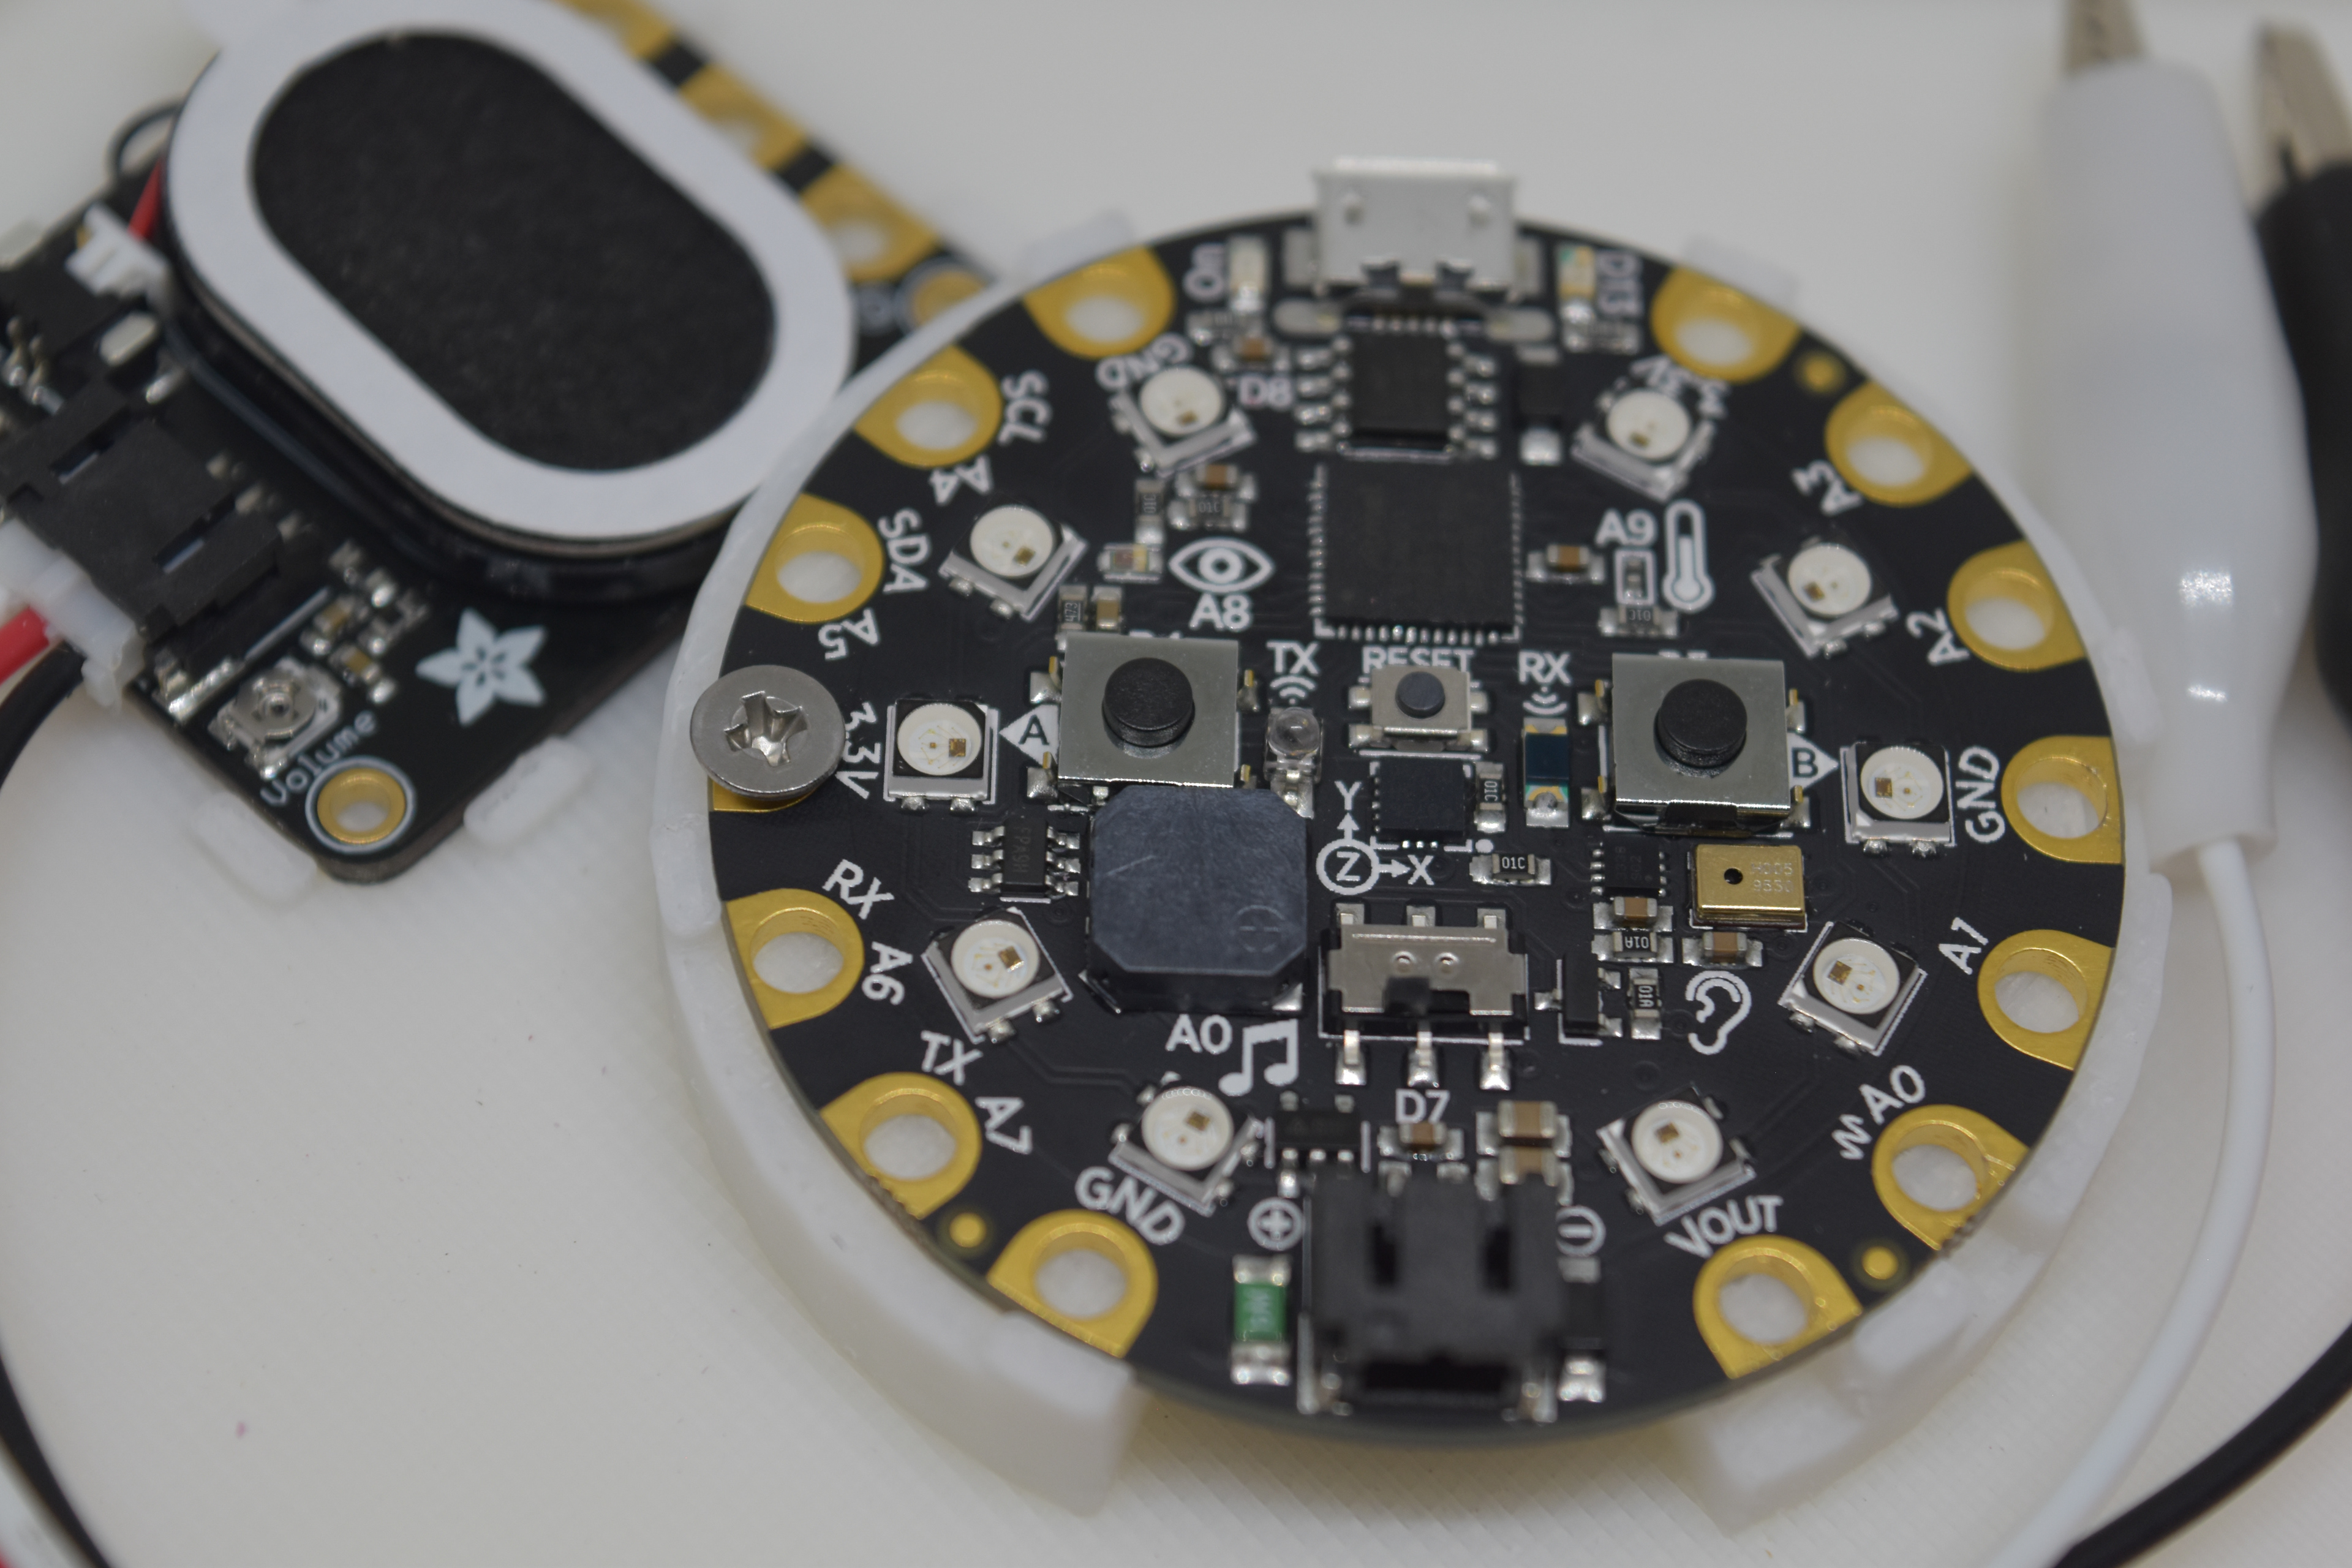
It would fit together with a friction fit and the Circuit Playground would clip into place in the center.

First Print
Strengths
The friction fit of the lid worked well. If I shook the box, the lid wouldn't come off. The texture of the bee on the top came out better than I expected. The brackets held the Playground in place well.
Needs Improvement
While the brackets were in the correct locations to hold Playground in place, the pins did not match the holes in the Playground. I hadn't planned the locations of the copper tape, so the tape looked messy. I also hadn't planned a method to hold the battery pack in place.
Questions
Can it be smaller? Can the sound be better?
Modeling Again
Final Print
Can it be smaller?
I decided that the box could not be smaller because I was going to add channels for the copper tape.
Can the sound be better?
I added a small speaker and brackets to keep it in place.
Interchangeable Lid
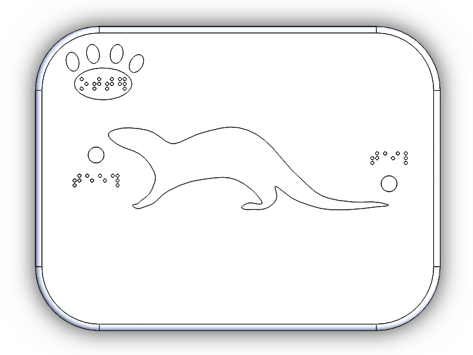
I modeled, then printed a second lid to show how the toy would work if a child had multiple lids for it. The second lid has an otter on it. To distinguish the lids from one another, I added icons in the top left with braille.
Copper Tape Channels
By adding these channels, I was able to plan the locations of the copper tape and keep it all on the lid of the box, which made the interchangeable lids function more easily. Because there wasn't space for the battery pack with the channels, I added a hole for a USB cable.
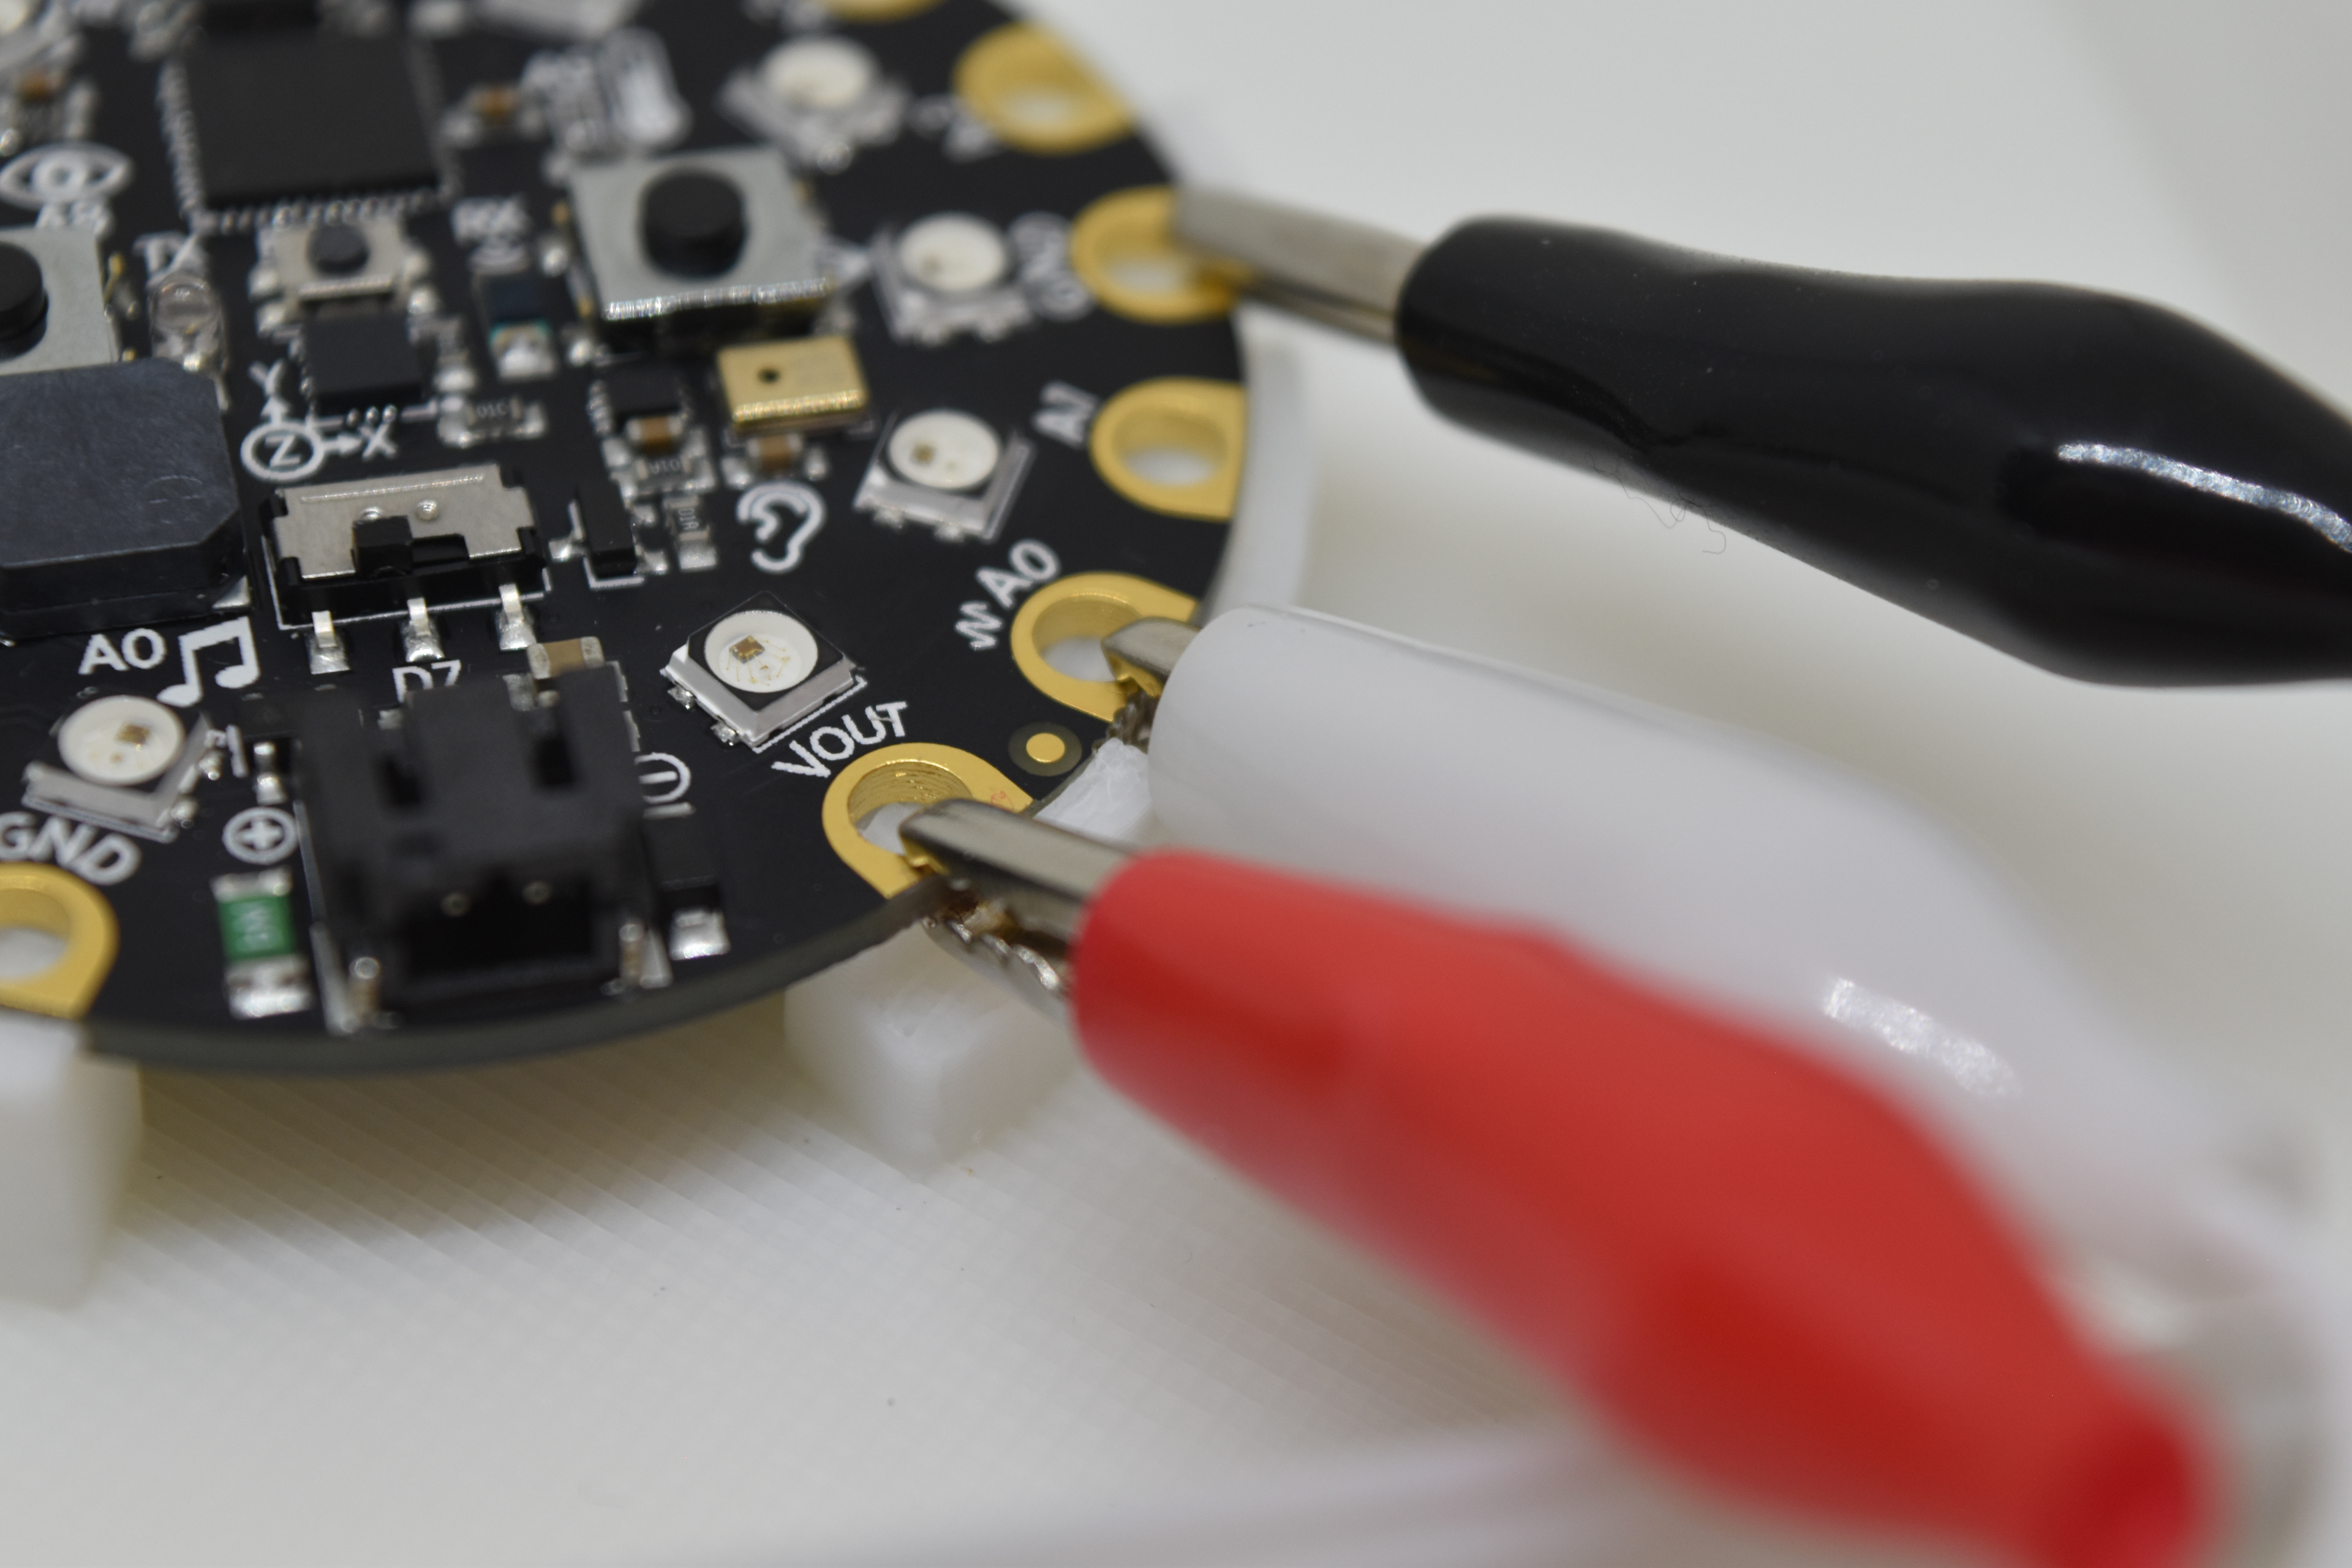
Securing the Playground
After my first 3D print, I realized that I would have to double-check my Solidworks model of the Circuit Playground. After checking it, I fixed the errors, then used that model to create holes where I could secure the Playground with screws and nuts.
Takeaways
There’s a lot of variation between 3D prints.
The otter lid didn’t friction fit on the interchangeable bottom. The lids looked very different. The lid with the otter was printed at an angle so it had striations. However, I couldn't sand the striations away because of the braille.
A lot of steps are necessary for use by blind children.
The braille must be precise so that the children can read it. I found that braille doesn't 3D print well. It's probably better to create the braille with a different material or use braille tape.
Long audio files don’t fit on the playground, because there isn't a lot of storage space. The touch toy may need to be connected to another device for more affordances in interaction.